DIY Tool Storage
Organizing your tools doesn’t have to be a hassle. With some creativity and a little DIY spirit, you can create efficient and organized tool storage solutions that not only keep your workspace tidy but also add a touch of personal flair. In this article, we’ll explore 6 clever DIY tool storage plans and ideas that will help you transform your workshop into an organized and functional space.
The Importance of Organized Tool Storage
In the realm of DIY projects and woodworking, the value of having organized tool storage cannot be overstated. An organized workspace not only enhances efficiency but also promotes safety and creativity. Whether you’re a seasoned craftsman or a hobbyist, maintaining a tidy and structured tool storage system offers a range of benefits that contribute to a more productive and enjoyable work environment.
Efficiency and Time Savings
When tools are neatly organized and easily accessible, you spend less time searching for what you need. A well-structured tool storage setup allows you to quickly locate the right tool for the task at hand, reducing downtime and increasing overall productivity. This efficiency becomes particularly valuable when tackling projects with tight deadlines or multiple steps.
Enhanced Safety
Cluttered workspaces can lead to accidents. Tools strewn around haphazardly pose a tripping hazard, while sharp or heavy tools that are not properly stored can cause injury. By organizing your tools and ensuring they have designated storage spaces, you create a safer environment for yourself and anyone else sharing the workspace.
Preservation of Tools
Proper tool storage helps extend the lifespan of your tools. Tools that are left exposed to dust, moisture, or extreme temperatures are more likely to degrade over time. By storing your tools in a structured manner, you shield them from potential damage and ensure they remain in good working condition.
Optimal Workflow
An organized tool storage system can significantly improve your workflow. With tools arranged in logical order, you can streamline your process and maintain a consistent rhythm. This optimized workflow minimizes interruptions and helps you maintain focus on the task at hand.
Creativity and Inspiration
A cluttered and disorganized workspace can stifle creativity. It’s challenging to feel inspired when you’re surrounded by chaos. On the other hand, a clean and organized environment can encourage creative thinking and innovative problem-solving. When your tools are readily available and your workspace is inviting, you’re more likely to embark on new projects and explore creative avenues.
Project Accuracy
Precision is crucial in many DIY and woodworking projects. Misplacing tools or using the wrong tool due to disorganization can lead to inaccuracies and mistakes. By having a designated place for each tool, you ensure that you’re using the right tool for the right job, resulting in more accurate and high-quality outcomes.

Reduced Stress
A cluttered and disorganized workspace can contribute to feelings of stress and overwhelm. Knowing where your tools are and having a structured system in place can alleviate these negative emotions, allowing you to focus on your work without the added mental strain.
Long-Term Savings
Maintaining organized tool storage can actually save you money in the long run. When you can easily locate your tools, you’re less likely to purchase duplicates out of frustration or because you can’t find what you need. Additionally, well-preserved tools are less likely to need frequent replacements, leading to cost savings over time.
1. Pegboard Wall Organizer
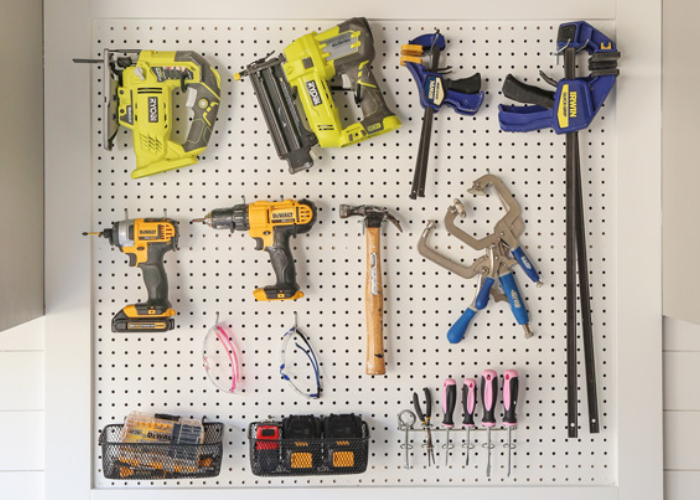
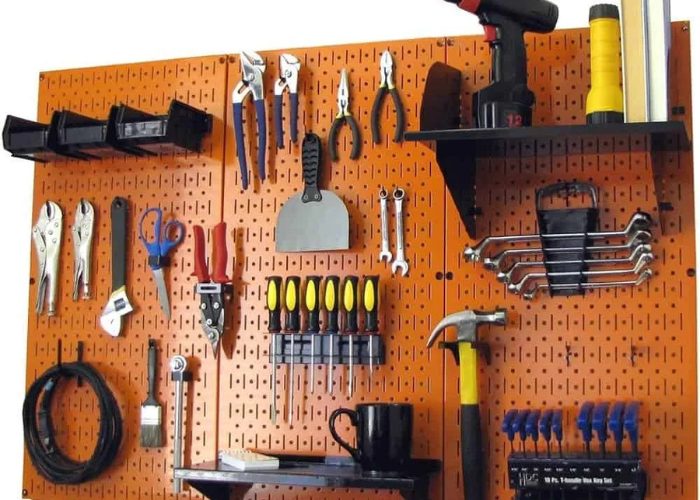
A pegboard wall organizer is a classic yet effective way to keep your tools within reach. Attach a pegboard to your wall and hang your tools using hooks and holders. Label each area for specific tools to make finding and returning items a breeze.

Benefits and Tips:
The pegboard wall organizer allows for quick and easy access to your tools, reducing the time spent searching for items.
Utilize different types of hooks and holders to accommodate tools of various shapes and sizes.
Customize the organization based on your workflow and the types of projects you frequently undertake.
Consider adding shelves or baskets to hold smaller items that may not hang well on hooks.
Regularly declutter and reorganize the pegboard to maintain its efficiency.
Use the pegboard to display frequently used tools as a visual reminder of your available resources.
Creating a pegboard wall organizer is not only a practical organizational solution but also a creative way to enhance the aesthetic appeal of your workspace. With a well-organized pegboard, you can streamline your projects and enjoy a clutter-free environment that fosters productivity and creativity.
2. PVC Pipe Tool Rack

Check the Full Plan
Crafting a DIY tool rack from PVC pipes is a creative and efficient solution to organize your tools in a neat and accessible manner. This project allows you to customize the size and design of the rack to accommodate various tools, making it a versatile addition to your workshop or garage. Let’s delve into the steps to create your own PVC pipe tool rack.
Benefits and Tips:
A PVC pipe tool rack is customizable, allowing you to design it to suit your specific tool storage needs.
Utilize various connectors to create shelves, hooks, and compartments that accommodate different tools.
Paint the PVC pipes and connectors to match your workspace’s color scheme or create a visually appealing contrast.
Place smaller tools in narrower sections of the rack and reserve wider sections for larger items.
Incorporate labels or tags to indicate the type of tool that belongs in each section.
For a more polished look, sand the cut edges of the PVC pipes to ensure they are smooth.
Crafting a PVC pipe tool rack provides an innovative and cost-effective solution for keeping your tools organized and easily accessible.
By customizing the design to fit your tools and workspace, you can create a functional storage solution that adds efficiency and order to your DIY projects.
3. Rolling Tool Cart

Check the Full Plan
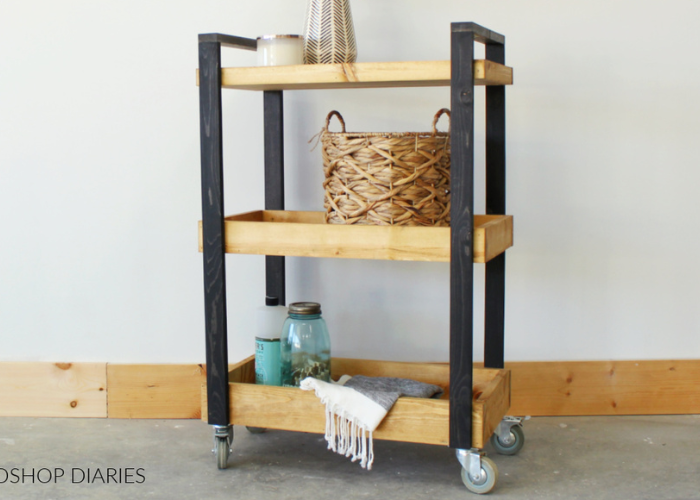
Creating a rolling tool cart provides you with a portable and efficient storage solution that adapts to your work demands. By designing the cart to accommodate your tools and incorporating organizational features, you can streamline your projects and enjoy a clutter-free workspace that promotes productivity and order.
Benefits and Tips:
A rolling tool cart offers mobility, allowing you to move your tools to different work areas as needed.
Customize the cart’s design and features based on your tools and workflow.
Use lockable casters to keep the cart stationary when working on specific tasks.
Incorporate tool holders, hooks, or magnetic strips to keep your tools organized and easily accessible.
Consider adding a power strip or extension cord holders to the cart for convenient power access.
Place frequently used tools on the top shelf for quick access.
Keep the cart organized by returning tools to their designated spots after each use.
4. Hinged Garden Tool Rack

Check the Full Plan
Creating a hinged garden tool rack combines ingenuity with practicality, offering a space-saving solution that keeps your gardening tools organized and easily accessible. By repurposing a hinged structure, you can transform your gardening routine and enjoy a clutter-free space that supports your outdoor activities.
Benefits and Tips:
- A hinged garden tool rack optimizes vertical space while providing a unique and functional storage solution.
- Utilize different types of hooks, clips, or pegs to accommodate various garden tools, such as shovels, rakes, and pruners.
- Consider painting or finishing the hinged structure to protect it from the elements if it will be used outdoors.
- Place larger tools closer to the bottom of the rack for stability and easier access.
- Incorporate labels or tags to indicate where each tool belongs for quick identification.
- Use the top of the hinged structure to store smaller gardening accessories like gloves, twine, or plant markers.
- Regularly maintain and lubricate the hinges to ensure smooth movement.
5. Tin Can Tool holder

Check the Full Plan
Reuse tin cans by attaching them to a wooden board or a wall. They make excellent caddies for smaller tools and supplies like brushes, pencils, or screws. Crafting a tin can tool caddy not only helps you keep your workspace organized but also showcases your creativity in repurposing everyday materials. By turning tin cans into functional holders, you create a practical storage solution that adds character and efficiency to your DIY endeavors.
Benefits and Tips:
A tin can tool caddy is a budget-friendly and eco-conscious way to repurpose materials for organization.
Customize the caddy’s layout and arrangement based on the types of tools and accessories you use frequently.
Consider painting the tin cans in colors that match your workspace’s theme for a cohesive look.
Add labels or tags to the tin cans to identify the contents of each holder.
Securely fasten the tin cans to the base to prevent them from tipping over or falling.
Use different sizes of tin cans to accommodate a variety of tools and accessories.
If using a countertop caddy, place it near your workspace for easy access during projects.
6. Tool Shadow Board

Check the Full Plan
Is your workspace cluttered with tools scattered everywhere, making it challenging to find what you need when you need it? Enter the DIY Tool Shadow Board – a cost-effective and efficient solution to keep your tools organized and easily accessible. In this guide, we’ll walk you through the process of creating your own Tool Shadow Board to enhance your workspace organization.
Tips for Maximizing the Effectiveness of Your Tool Shadow Board
a) Strategic Placement
Strategically place your Tool Shadow Board in a central location where it’s easily visible and accessible. This encourages employees to use it consistently and helps maintain the organization of the workspace.
b) Regular Audits
Conduct regular audits to ensure that tools are returned to their designated spots on the board. This practice reinforces the importance of organization and helps correct any deviations that may occur over time.
c) Optimal Tool Arrangement
Arrange tools on the board based on their frequency of use. Frequently used tools should be within easy reach, while less frequently used tools can be placed in less accessible areas.
d) Consider Ergonomics
When arranging tools, consider the ergonomic aspect. Place tools at heights and positions that are comfortable for employees to reach without straining.
e) Employee Involvement
Involve your employees in the setup and maintenance of the Tool Shadow Board. Their input can provide valuable insights into the most effective tool placements and contribute to a sense of ownership in maintaining the organization.
Conclusion
Organizing your tools can be both functional and enjoyable with these clever DIY storage plans and ideas. Whether you’re aiming for a sleek pegboard setup, repurposing old items, or building custom storage solutions, these options will help you keep your tools in order while adding a personal touch to your workspace. So roll up your sleeves, gather your tools, and embark on these creative projects to make your workshop a more organized and efficient space.
Also read:

