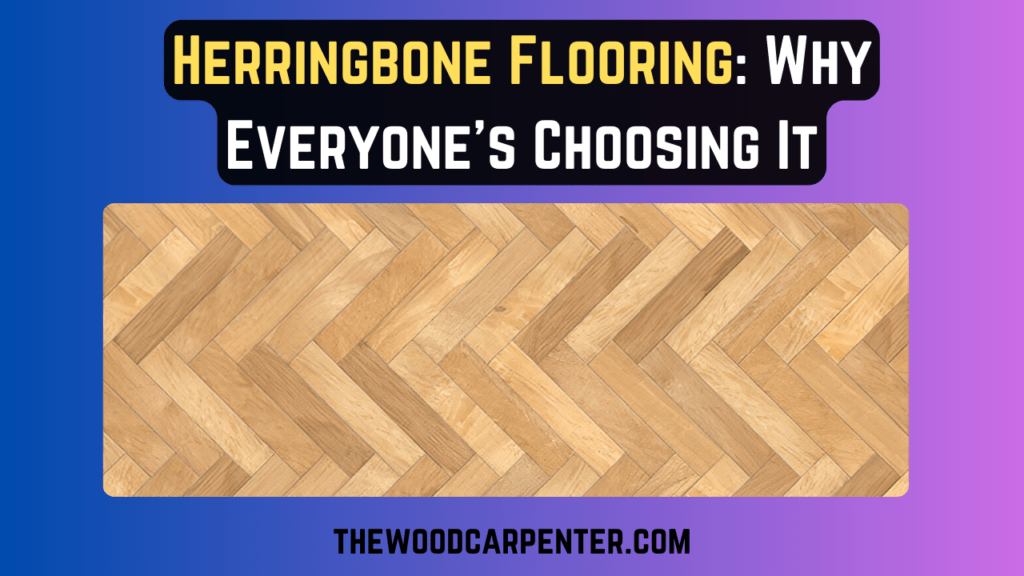
Herringbone flooring has a unique pattern and classy look. Whether redecorating your home or building a new one, this type of flooring is always a fashionable option. In this simple guide, we’ll discuss what herringbone flooring is and how to lay it out and look after it — as well as why it’s still one of the most popular flooring styles in home decor.
What is Herringbone Flooring ?
Herringbone flooring is made by laying small wooden planks in a zigzag or V-shaped pattern. The design looks like the bones of a fish called a herring—this is where it gets its name. It started a long time ago in ancient Rome and has changed over the years, but it’s still seen as a sign of elegance and good taste.
Herringbone is a pattern of small blocks which are laid in such a way, that they create the appearance of a fish bone. The design of the system resembles the bones of a herring fish — that’s how it got its name. It began long ago in ancient Rome and has evolved over the centuries, but it still signifies elegance and good taste.
The History of Herringbone Flooring
The first use of herringbone patterns dates back to ancient Rome, for roads and buildings. WHEW! Later, people began adapting the pattern for floors (particularly in castles and fancy houses). Rich families in Europe began to adopt it in the 1500s and 1600s. Now, herringbone floors can be found not just in luxe locations like hotels but also in regular homes and businesses.
Also read:
Manufactured Wood vs. Solid Wood: Which is Better ?
Why Choose Herringbone Flooring ?
Timeless Beauty
One of the main reasons people like herringbone flooring is that it will never go out of style. The special pattern on it lends each space a sophisticated and stylish touch.
It’s equally at home in old-fashioned and modern ones. And no matter what your aesthetic is, herringbone flooring adds charm and personality to your place.
Flexible and Stylish
Herringbone flooring is incredibly versatile as to places and ways you can use it. It is available in a variety of materials, including wood, vinyl and laminate, so you can choose what’s right for your home and budget.
It sits beautifully in all sorts of spaces — kitchens and living rooms, hallways and even bathrooms. You also get to select different sizes as well as direction for your pattern which is great options to help match your design style.
Types of Herringbone Flooring
Solid Wood Herringbone Flooring
- Made from 100% real hardwood(oak, walnut, maple).
- Can be sanded and refinished several times.
- Best for consistent humidity.
Engineered Herringbone Flooring
- Consists of a hardwood veneer over plywood or HDF core.
- Less susceptible to moisture and temperature variations.
- Perfect for kitchens, basements and over in floor heating.
Laminate Herringbone Flooring
- Great budget option with printed wood look.
- Scratch-resistant and easy to maintain.
- Suitable for high-traffic areas.
Luxury Vinyl Tile (LVT) Herringbone Flooring
- Waterproof and highly durable.
- Mimics real wood with realistic textures.
- Perfect for bathrooms and commercial spaces.
How to Install Herringbone Flooring ?
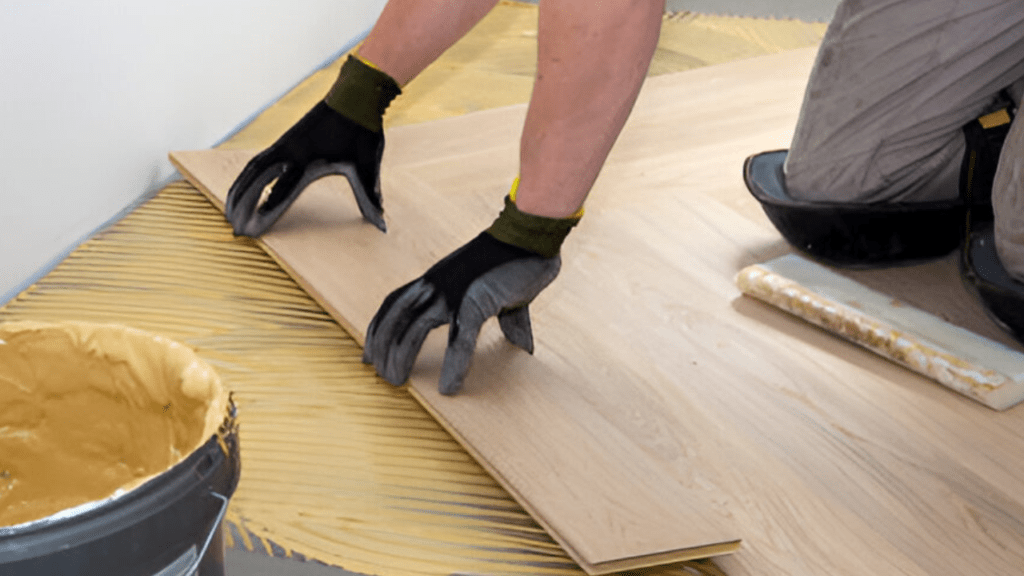
Installing herringbone flooring is a little trickier than regular flooring because of its detailed pattern. But with the right tools and a bit of patience, you can do it!

Getting Ready
Before you start, make sure the floor underneath (called the subfloor) is clean, flat, and dry. If you’re using wood or laminate planks, let them sit in the room for at least 2 days before installing.
This helps the material get used to the room’s temperature and stops it from expanding or shrinking later.
Tools and Materials You’ll Need
To install herringbone flooring, you’ll need:
- Flooring glue or adhesive
- A saw (to cut the planks)
- A tape measure
- A square (to help make straight lines)
- A mallet (soft hammer)
- Spacers (to keep even gaps)
- A utility knife (for cutting vinyl or laminate)
Easy Step-by-Step Instructions
- Plan the layout: Draw a grid or guide lines on the subfloor to help keep the pattern straight.
- Cut the planks: Use the saw to cut your flooring planks. Try to make clean cuts so the edges look neat.
- Glue it down: Spread the glue on the subfloor (if needed), and start placing the planks in the herringbone pattern. Make sure each piece fits snugly.
- Keep going: Keep laying planks across the room, one section at a time. Use spacers to keep the gaps even.
- Finish up: Once all the planks are down, let the glue dry (check the instructions for how long). Then, trim off any extra pieces along the edges to give it a neat look.
How Much Does Herringbone Flooring Cost ?
The price depends on the material you choose. Real wood and fancy parquet can be expensive. But if you’re looking to save money, laminate or vinyl herringbone flooring is a more budget-friendly choice—and it still looks great!
Factors Affecting Cost
Material: Real wood is usually the most expensive. Fancy parquet is also costly. Laminate and vinyl are cheaper options.
Room size: Bigger rooms need more flooring, which means a higher cost.
Installation: Hiring a professional to install it adds to the price, especially if the floor needs a lot of prep work.
Budget-Friendly Alternatives
If you want the herringbone look without spending too much, go for laminate or vinyl. They look great and cost much less than real wood.
Herringbone Flooring vs. Chevron Flooring
| Feature | Herringbone Flooring | Chevron Flooring |
| Pattern | Broken zigzag (90° angles) | Continuous “V” shape (45° angles) |
| Installation | More forgiving | Requires precise cuts |
| Visual Effect | Subtle, textured | Bold, uniform |
| Best For | Traditional & modern spaces | High-impact, contemporary designs |
How to Take Care of Herringbone Flooring?
Regular Cleaning
Herringbone flooring is easy to care for. Just sweep or vacuum often, and clean with a microfiber mop and a gentle cleaner made for your type of floor. If you have wood floors, use only a damp mop—don’t soak it with water.
Fixing Scratches or Damage
Over time, your floor may get some scratches. For wood, you can sand and refinish it to make it look new again. If you have laminate or vinyl, you can simply replace the damaged plank.
Common Mistakes to Avoid When Installing
Not preparing the subfloor: Make sure the floor underneath is clean, dry, and level before starting.
Skipping the acclimation step: Let your flooring sit in the room for at least 2 days before installing it. This helps it adjust to the room temperature.
Misaligned pattern: Make sure the herringbone pattern lines up properly all across the room.
Frequently Asked Questions (FAQs)
1. How long does herringbone flooring last?
With good care, this flooring can last for many years. Wood flooring can even last 50 years or more.
2. Is herringbone flooring good for kitchens?
Yes! Just choose water-resistant materials like vinyl or laminate for kitchen areas.
3. Can I install it myself?
Yes you can, with the proper tools and if you follow the steps. If that seems too tricky, you’re better off hiring a pro.
4. How do I clean wood herringbone flooring?
Use a soft mop and a little water. Avoid using too much water. Vacuum often to keep dust away.
5. What is the best material for herringbone flooring?
Well, it depends on how much you’re willing to spend and so forth. Wood looks fancy and classic. Laminate and vinyl are more cost effective and take less work to maintain.
6. Can I use it in bathrooms?
Yes, you can. But for wet areas like bathrooms, vinyl or waterproof tile might be the best choice.
Conclusion: Why Herringbone Flooring is Worth It
Herringbone flooring adds a classy, stylish touch to any of your room. Whether you pick wood, laminate, or vinyl, it brings the beauty and charm. With regular cleaning and care, this herringbone flooring will make your home look great for many years.

