
Last Updated on August 27, 2026 by Sam Wood Worker
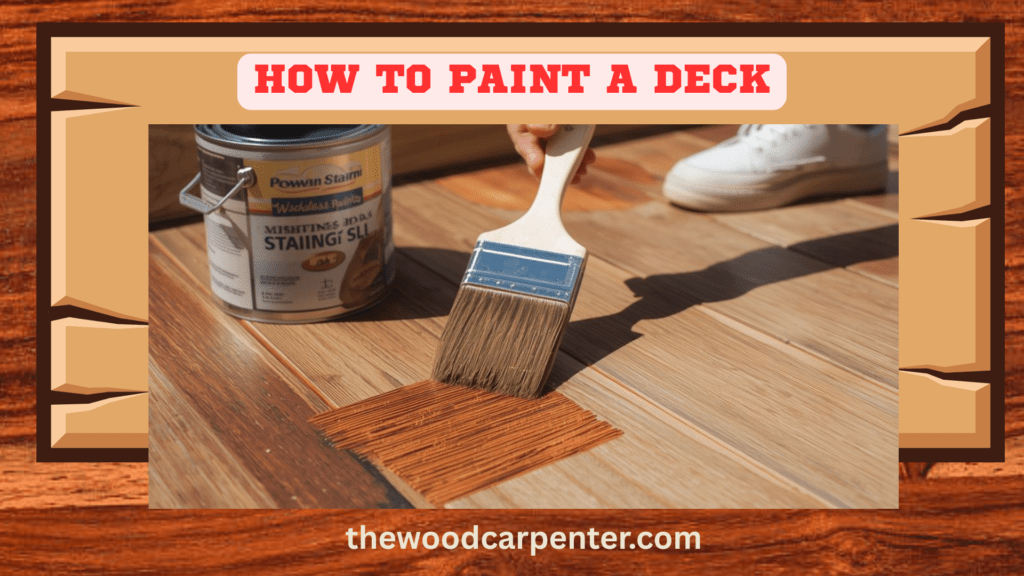
Painting a deck can completely change the look of your outdoor space. A faded, weathered deck can make an otherwise nice backyard look worn out, while a fresh finish can make the entire area feel cleaner and more inviting.
But painting a deck isn’t quite the same as painting a wall.
Your deck has to deal with rain, sunlight, temperature changes, foot traffic, furniture, and moisture. If the wood isn’t prepared properly, even a good-quality paint can start peeling sooner than you expect.
The good news? You don’t need to be a professional painter to get good results. The biggest part of the job is preparation.
This guide walks you through how to paint a deck, from inspecting and cleaning the wood to applying the final coat.
Think of this article as a practical research-based guide rather than a personal account of painting one particular deck.
If you’re working on your own deck, the instructions on your paint can should always take priority, especially when it comes to drying times, coverage, temperature, and whether you need primer.
Now let’s get into the actual process.
Quick Answer
To paint a deck, start by inspecting the boards and repairing any damaged or rotten wood. Clean the entire surface and allow it to dry completely. Remove loose old paint, sand rough areas, and apply primer if your chosen product requires it. Then apply a deck paint designed for horizontal, walk-on surfaces, usually in two thin coats.
Don’t rush the cleaning and drying stages. Painting over dirty or damp wood is one of the easiest ways to end up with peeling paint.
Always follow the instructions on your specific paint or stain because drying times, primer requirements, temperature limits, and the number of recommended coats can vary between products.
Key Takeaways
- Good preparation is more important than simply buying an expensive paint.
- Use a product designed for decks, porches, or other horizontal walk-on surfaces.
- Repair rotten, cracked, or unstable boards before painting.
- Remove loose and peeling paint before applying a new coating.
- Two thin coats usually provide a better finish than one thick coat.
- Give the wood enough time to dry after cleaning.
- Weather and humidity can have a big effect on drying and curing.
- Always follow the manufacturer’s instructions for your particular product.
Why Paint a Deck?
There are a couple of obvious reasons people paint their decks.
The first is appearance.
Wood naturally turns gray and weathered when it spends years outside. Add some peeling finish, stains, and general wear, and a deck can start looking much older than it really is. A fresh coat of paint can give it a completely different appearance without replacing the entire deck.
The second reason is protection.
Outdoor wood is constantly exposed to moisture and sunlight. A suitable coating can help protect the surface from the elements and slow down weathering.
But there is an important catch: paint isn’t always the best choice for a deck floor.
Paint forms a film over the surface of the wood. As the boards expand and contract with changes in temperature and moisture, that film can eventually crack or peel. Deck floors also get a lot of abuse from shoes, pets, outdoor furniture, and everyday use.
Solid-color stain is another option. It still provides strong color coverage, but it generally behaves differently from a film-forming paint.
That’s why some homeowners choose paint for railings, posts, and other vertical surfaces while using a solid stain on the deck floor.
If you’re starting from scratch, it’s worth deciding between deck paint and solid stain before you begin.
What You’ll Need
Having everything ready before you start makes the job much easier.
Here’s a basic list:
- Deck cleaner or mild detergent
- Garden hose and stiff scrub brush
- Pressure washer, if appropriate
- Wood filler or exterior-grade wood putty
- Replacement deck boards if necessary
- Medium-grit sandpaper or a power sander
- Paint scraper or wire brush
- Painter’s tape
- Drop cloths
- Exterior wood primer, if required
- Deck paint or porch-and-floor paint suitable for horizontal surfaces
- Paintbrushes
- Paint roller
- Extension pole
- Paint tray
You may not need every item on this list.
For example, some products are designed to go directly onto properly prepared wood without a separate primer. Others specifically recommend a primer, particularly when you’re painting bare or repaired wood.
Check the product instructions before buying everything.
Step 1: Inspect the Deck
Before you start cleaning or painting, walk around the entire deck and look closely at the wood.
Don’t just look at the areas that are easy to see. Check the corners, stairs, railings, and areas where water tends to collect.
Look for:
- Cracked or split boards
- Soft or spongy wood
- Rotten sections
- Loose screws or nails
- Damaged stair treads
- Wobbly railings
- Loose posts
- Areas where old paint is badly peeling
This step matters because paint isn’t a repair product.
If a board is rotten, painting over it won’t make it strong again. The fresh paint may hide the problem temporarily, but the damaged wood underneath will continue to deteriorate.
If you find a badly damaged board, replace it before moving on.
The same goes for loose railings and structural problems. Fix those first. Painting should be one of the final stages of the project, not a way to cover up problems.
Step 2: Clean the Deck Thoroughly
If there’s one preparation step you shouldn’t rush, it’s cleaning.
Start by sweeping away leaves, dirt, dust, and other debris.
Then clean the deck using an appropriate deck cleaner or mild detergent solution. A stiff scrub brush can work well, especially if the deck isn’t extremely dirty.
A pressure washer can also be useful, but use it carefully.
It’s surprisingly easy to damage wood with a pressure washer. Holding the nozzle too close or using excessive pressure can leave grooves and marks in softer woods such as cedar or pine.
Keep the nozzle moving and avoid concentrating the spray on one spot.
The goal is to remove dirt, mildew, algae, and old surface residue without damaging the wood itself.
Let the Deck Dry
This is where patience pays off.
After cleaning, let the deck dry completely before you paint it.
Depending on the weather, humidity, and condition of the wood, this can take a day or several days.
Don’t assume that wood is dry just because the surface looks dry. Moisture can remain inside the boards.
Painting damp wood can lead to poor adhesion, peeling, bubbling, and other problems.
If you use a moisture meter, follow the moisture level recommended by your specific paint manufacturer. Some products specify a maximum moisture content before application.
Step 3: Remove Peeling Paint
If your deck has been painted before, inspect the old coating carefully.
Is it firmly attached?
Or is it cracking, bubbling, and coming away from the wood?
Loose paint needs to be removed before you apply anything new.
Use a paint scraper or wire brush to remove sections that are peeling or flaking. You don’t necessarily need to strip every tiny bit of old paint from the deck, but anything that is poorly bonded should come off.
There’s no point putting a beautiful new coating over paint that’s already failing.
The new coating will eventually come off with it.
Step 4: Sand the Deck
Once the loose paint has been removed, sand the surface.
Sanding helps with several things at once. It can smooth rough areas, reduce splintering, and soften the transition between bare wood and old paint.
For large, flat sections, a power sander can save a lot of time. For railings, corners, and smaller areas, hand sanding is usually easier.
Medium-grit sandpaper around 80–100 grit can be suitable for general deck preparation, although the right grit depends on the condition of the surface and the coating you’re applying.
You don’t need to turn the entire deck into perfectly smooth furniture.
You’re mainly trying to create a clean, reasonably smooth surface that is ready to accept the new coating.
When you’re finished sanding, remove the dust thoroughly.
A quick sweep isn’t always enough. Paint applied over sanding dust can leave a rough or uneven finish.
Step 5: Repair Small Surface Damage
Now that the deck is clean and sanded, look over it again.
Small cracks, nail holes, and shallow imperfections can sometimes be filled with an exterior-grade wood filler.
Apply the filler according to the product instructions, allow it to cure, and sand the repaired area so it sits reasonably flush with the surrounding surface.
Don’t use filler as a substitute for replacing rotten wood.
If you discovered a seriously damaged board earlier, replace it before you continue with priming and painting.
Step 6: Apply Primer if Your Product Requires It
This is one step where you shouldn’t rely on a generic rule.
Some deck paints and coatings require primer. Others are designed to be applied directly to properly prepared wood.
For example, a true enamel-type deck paint applied to bare or heavily repaired wood may benefit from a suitable primer. A self-priming solid-color stain may have different requirements.
Read the label and technical data sheet for the exact product you’re using.
If primer is required, apply it evenly and allow it to dry for the time specified by the manufacturer.
Don’t rush straight into painting just because the primer feels dry on the surface.
Step 7: Paint the Deck
Once the surface is properly prepared, it’s finally time for the part you’ve been waiting for.
The easiest approach is generally to work from the higher surfaces down.
1. Start With Railings and Posts
Paint the railings, balusters, and posts first.
These vertical surfaces are easier to work on before you have a freshly painted deck floor underneath you.
Take your time around corners and joints. A brush is usually easier than a roller for these smaller areas.
2. Move to the Stairs
If your deck has stairs, plan your work so you don’t paint yourself into a corner.
If you need to use the stairs while the coating dries, you may need to work in sections and leave an appropriate path available.
Follow the product’s instructions regarding foot traffic.
3. Paint the Deck Floor Last
Start at the area farthest from your exit and work toward it.
That might mean starting at the outside edge and working back toward the house, depending on your deck layout.
The goal is simple: don’t trap yourself on wet paint.
Use Thin, Even Coats
One of the most common mistakes is trying to get complete coverage in one heavy coat.
It can be tempting, especially when you’re trying to finish the job quickly.
Resist that temptation.
A thick coat can take longer to dry, may sag or drip, and can have trouble curing properly. Applying the recommended number of thinner coats generally produces a more consistent finish.
If your product calls for two coats, give the first coat the recommended drying time before applying the second.
Pay Attention to the Weather
Weather can make or break an outdoor painting project.
Extreme heat, cold temperatures, high humidity, direct sunlight, and rain can all affect how a coating behaves.
Don’t simply choose a day because the weather app says it won’t rain for an hour.
Check the forecast for the entire drying and recoat period.
Your paint manufacturer will also provide an acceptable application temperature range. Follow that range rather than assuming every exterior paint behaves the same way.
Is My Deck Rotting or Just Weathered? 5 Simple Tests to Tell
Deck Repair vs Replace: The Simple Screwdriver Test
Step 8: Let the Deck Cure
Dry and cured are not the same thing.
A coating may feel dry to the touch after several hours but still be relatively soft underneath.
Full curing can take considerably longer, depending on the product and weather conditions.
During this period, avoid unnecessary foot traffic, dragging furniture across the surface, or placing outdoor rugs on the deck.
Give the coating time to develop its intended hardness.
The exact waiting period should come from the product manufacturer.
Can You Paint Over an Old Stained Deck?
Sometimes you can, but the type and condition of the old finish matter.
If the existing finish is a solid-color stain and it’s firmly attached to the wood, a compatible new coating may be applied after proper cleaning and preparation.
Transparent and semi-transparent stains are a different situation. They don’t create the same type of surface as a solid coating, so compatibility can be more complicated.
Another thing to consider is whether the existing finish is oil-based or water-based.
Don’t assume that one product can automatically be applied over another.
If you’re unsure, check the manufacturer’s compatibility information or test the new coating on a small, inconspicuous area first.
A small test patch can save you from discovering a compatibility problem across the entire deck.
Common Deck Painting Mistakes
A few mistakes show up repeatedly when people paint outdoor wood.
Painting damp wood
This is a big one.
If the wood hasn’t dried properly after cleaning, the coating may not bond as it should.
Using regular wall paint
Your deck floor isn’t a wall.
It has to handle foot traffic, weather, moisture, and movement in the wood. Use a product specifically designed for horizontal, walk-on surfaces.
Skipping surface preparation
Painting over dirt, mildew, peeling paint, or rough damaged wood doesn’t eliminate those problems.
It simply hides them temporarily.
Applying one very thick coat
More paint doesn’t necessarily mean better protection.
Follow the manufacturer’s recommended coverage and coat schedule.
Recoating too soon
A coating can feel dry while still needing more time before another coat is applied.
Follow the specified recoat time.
Ignoring the forecast
A sudden rainstorm can ruin a coating that hasn’t had enough time to set.
Before starting, make sure the weather gives you enough time for application and drying.
Deck Paint vs. Solid-Color Stain
If you’re still deciding between the two, here’s a simple comparison:
| Feature | Deck Paint | Solid-Color Stain |
|---|---|---|
| Appearance | Opaque color | Opaque color |
| Wood grain | Mostly hidden | Mostly hidden |
| Surface behavior | Forms a film | Designed to penetrate/coat the wood differently |
| Wood movement | Can be more prone to cracking or peeling | Generally more forgiving |
| Deck floor | Can work with the right product, but requires careful product selection | Common choice for horizontal wood surfaces |
| Maintenance | Failed paint may require scraping and sanding | Often easier to clean and recoat |
| Primer | Product-dependent | Often self-priming, depending on product |
This is a general comparison, not a rule for every product. Formulas vary, so check the instructions for the exact paint or stain you’re considering.
Should You Paint the Deck Floor or Use Stain?
This is worth thinking about before you buy your supplies.
If your main goal is a solid, uniform color, paint may appeal to you.
If you want a solid appearance but are more concerned about how the finish handles normal wood movement and maintenance on a horizontal surface, a quality solid-color deck stain may be worth considering.
There’s no single answer that’s right for every deck.
The condition of the wood, the existing coating, the amount of foot traffic, and the product itself all matter.
A Note About Deck Safety and Building Codes
Painting is often only one part of a larger deck project.
If you’re also replacing railings, stairs, posts, or other structural components, check your local building requirements before you begin.
Railings and stair components may have specific requirements for height, spacing, strength, and other safety details.
If you’re replacing damaged parts, don’t assume that matching the old dimensions automatically means the replacement meets current requirements.
When you’re unsure, contact your local building department before making structural changes.
Frequently Asked Questions
How long does it take to paint a deck?
For an average deck, the project can easily take a weekend or longer.
The actual painting isn’t necessarily the slowest part. Cleaning, repairs, sanding, and especially drying can add significant time.
If the weather is humid or the wood is holding a lot of moisture, the preparation stage may take longer.
Can I paint over a stained deck?
Sometimes.
A solid-color stain that is still firmly attached may be compatible with a new coating after proper cleaning and preparation. Transparent and semi-transparent stains can be more difficult.
Always check compatibility before covering an existing finish.
Do I need to sand a deck before painting?
Usually, some sanding is a good idea.
It helps smooth rough wood and removes the sharp edges between old paint and bare areas.
However, preparation requirements vary between products. Some specialty coatings have different requirements, so check the product label.
What is the best weather for painting a deck?
Mild, dry weather is generally preferable.
Avoid painting during extreme heat, very cold conditions, heavy humidity, or when rain is expected during the product’s required drying period.
Most importantly, follow the temperature and weather requirements provided by the manufacturer.
Is deck paint different from regular exterior paint?
Yes.
Deck and porch-floor coatings are designed for surfaces that experience foot traffic and weather exposure. Regular exterior wall paint is intended for vertical surfaces and isn’t necessarily suitable for a deck floor.
Always make sure the product you choose is specifically approved for the surface you’re painting.
How many coats of paint does a deck need?
It depends on the product.
Many deck paints recommend two coats, but you should follow the instructions for your specific product.
Applying extra coats doesn’t automatically make a coating last longer.
Final Thoughts
Painting a deck isn’t difficult because the painting itself is complicated. The challenge is getting the wood ready and then giving the coating enough time to do its job.
Clean the deck properly. Fix the damaged boards. Remove anything that’s loose or peeling. Let the wood dry. Sand where necessary. Then apply the right product in the recommended coats.
Those steps may take more time than you expected, but they’re also where most of the difference between a good-looking deck and a peeling deck comes from.
And before you open that paint can, take a few minutes to read the manufacturer’s instructions. The label will tell you things a general guide can’t, including the correct application temperature, drying time, recoat window, coverage, and whether primer is required.
Take your time with the preparation, and the actual painting becomes the easy part.